The need for effective and “intelligent” chatbots in applications and websites is growing. This type of interaction can reduce the time required to retrieve the information users need and can serve as the first level of an efficient and useful helpdesk. The old and annoying chatbots that only tested your patience are no longer used because it is now very easy to create systems based on LLMs trained with proprietary and relevant information.
In this post, we will see how to integrate a chatbot into a WordPress site and connect it to Cheshire Cat AI [1], an interface for using and managing LLMs similar to OpenWeb UI.
Project Description
This project is similar to one presented in a previous post using OpenWebUI [7] and, like that one, it will use Ollama [8] as the LLM engine and mistral:7b as the LLM.
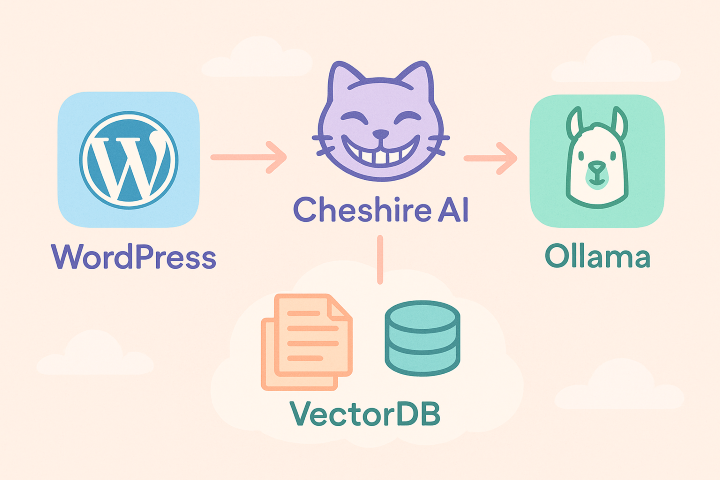
The system will consist of a WordPress site where we will install a plugin called Cheshire Cat Chatbot, connected to a backend made up of Cheshire Cat AI, which in turn will use the Ollama engine to run the usual mistral:7b model. In short, a nice chain of products that together form a complete and functional system.
In this post, we will install everything locally, but since a similar solution seems to have been adopted by the Tuscany Region [4], it is conceivable that, with appropriate modifications and optimizations, it could be a system usable in production as well.
Prerequisites
You need to have a WordPress site already running on the computer you are working on; for example, you can quickly set one up using the LocalWP program [10] [11].
Ollama must also be installed and configured; post [8] explains how to do this in a few simple steps and how to make it use mistral:7b as the LLM.
Finally, on the local system (in my case Windows 11), Docker (Docker Desktop on Windows) must be installed and running.
Installation and Configuration
After installing WordPress and Ollama, you can proceed with the following steps:
- Install Cheshire Cat AI (Docker container):
- Create a compose.yml file in a folder of your choice (e.g., provacheshire) with this content:
services:
  cheshire-cat-core:
    image: ghcr.io/cheshire-cat-ai/core:latest
    container_name: cheshire_cat_core
    ports:
      - 1865:80
      - 5678:5678
    environment:
      - CCAT_API_KEY=Ky-dmuH27489j
    volumes:
      - ./static:/app/cat/static
      - ./plugins:/app/cat/plugins
      - ./data:/app/cat/data
    extra_hosts:
      - "host.docker.internal:host-gateway"
This command creates a container with three volumes (disks) running Cheshire Cat AI on port 80 inside the container. The application is exposed outside the container on port 1865 (1865:80). Additionally, a connection token is defined to secure communication between the WordPress plugin and Cheshire. The provacheshire folder will contain three subfolders: static, data, and plugins, which are mounted as disks on the container (/app/cat/static, /app/cat/plugins, /app/cat/data); this allows you, using Visual Studio Code, to create plugins locally and test them immediately on the container.
- Create and run the container with the command:
docker compose up
- Once the container is running, you can access the Cheshire Cat AI interface at http://localhost:1865/admin.
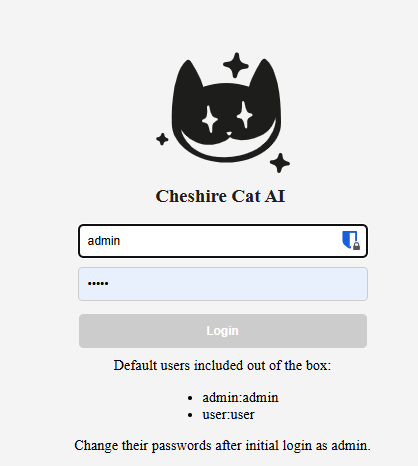
- Authenticate with the default administrator user: admin / admin.
- Create a compose.yml file in a folder of your choice (e.g., provacheshire) with this content:
- Configure Cheshire Cat AI (connect to Ollama):
- Open a shell and start Ollama locally with the usual command: ollama serve. It is important that it listens on all interfaces (0.0.0.0) and not just on the local one (127.0.0.1) so it can be accessed by applications running inside a container.
- From the shell, run ollama list to see the list of installed models available for use; in this case, choose mistral:7b:

- In the Cheshire Cat AI interface, go to Settings → Large Language Model → Configure and fill in the following fields:
- Base URL: http://host.docker.internal:11434
- Model: mistral:7b
- Click Save.
- Now, returning to Home, you can make the first query from the web interface:

- Install and configure the WordPress plugin:
- Start a local WordPress site, for example with Local [11].
- Log in as the site administrator.
- Go to WP → Plugins → Add New and search for the plugin Cheshire Cat Chatbot:

- Install and activate the plugin.
- Go to WP → Stregatto and fill in the following fields:
- Stregatto URL: http://localhost:1865
- Stregatto Token: Ky-dmuH27489j
- Click Save Changes.
- Go to WP → Stregatto → Configuration and enable the following settings:
- Enable global chat: yes
- Show on all pages: yes
- Enable chat on the homepage: yes
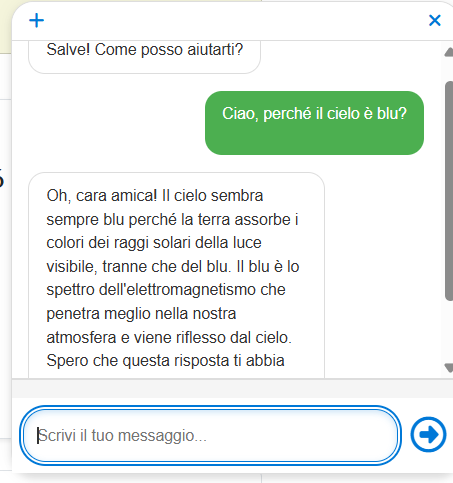
- At this point, the chatbot popup will appear on the site’s homepage, ready to be queried.
Considerations and Possible Developments
The system presented in this project is a complete system in the sense that it includes all components needed to create a customizable and private chatbot system. The components are open source, so they can be used within your web applications respecting their licenses.
The example shown is very simple and aims only to assemble and briefly describe all the elements involved, but it is possible to create complex and articulated solutions [4].
In particular, with Cheshire Cat AI, it is possible to build RAG systems and trigger custom scripts upon certain events, which is very useful for creating automated procedures. I may explore this system further in the coming weeks and propose modifications and improvements.
Possible further studies:
- Building a RAG system with Cheshire Cat AI.
- Managing hooks on Cheshire Cat AI.
Photo Gallery


Sources and References
-
- Cheshire Cat AI official website.
- Cheshire Cat Chatbot plugin for WordPress by Marco Buttarini.
- Lecture series on Stregatto by Prof. Michael Saccone Informatica, YouTube.
- Technical and architectural considerations on possible AI implementations, Tuscany Region.
- Discord channel of Cheshire Cat AI.
- Cheshire Cat AI, The Revolutionary Framework for LLM on Smartstrategy.eu.
- Open WebUI: a graphical interface for Ollama, on this blog.
- Running a local LLM model with Ollama, on this blog.
- RAG with Open WebUI: Chef Gino the cooking chatbot, on this blog.
- LocalWP, official website.
- How to Install WordPress Locally with Local By Flywheel, by Pascal Claro on YouTube.
*** Note: This article was translated using an automated workflow built with n8n and OpenAI.