Anyone starting with Python soon encounters a common problem: how to manage different libraries for different projects without creating confusion? The answer is: use virtual environments within your projects.
This article explains how to create a project using the uv tool, associate a virtual environment with a project, and provides a practical example with the arXiv library [3], which allows searching for scientific articles from the famous online archive. We will demonstrate these operations on Windows, but the steps are similar on Ubuntu, MacOS, or any Linux distribution. We will use a sample program, python-project-arxiv, available on GitHub [5].
What is a Virtual Environment?
A virtual environment is an isolated copy of Python that contains its own packages, separate from those installed globally on the system.
The main advantages are:
- avoiding conflicts between Python versions and libraries required by different projects;
- keeping the work environment organized and reproducible;
- easily sharing a project’s dependencies with others.
Practically, for each project, you can have an isolated environment with a specific version of Python, containing only the libraries needed for that project in the required version.
When a virtual environment is active, every python and pip command refers only to that environment, not the system Python, so the installed libraries pertain only to the virtual environment.
Why Use UV?
The uv tool (a package and project manager) makes the process of creating virtual environments faster and more intuitive.
With uv you can:
- create and manage virtual environments;
- install packages with a quick alternative to
pip; - run scripts directly within an environment, even without manually activating it.
Alternatives to uv include using venv (virtual environments) + pip (package installation) or using Anaconda [2], a suite that performs both functions but is more complex and mainly suited for data science and machine learning applications.
Installing UV
To install uv, run one of the following commands:
- On Linux/macOS:
curl -LsSf https://astral.sh/uv/install.sh | sh - On Windows (PowerShell):
powershell -ExecutionPolicy ByPass -c "irm https://astral.sh/uv/install.ps1 | iex"
After installation, the uv command will be available in the terminal, and you can check the installed version with uv --version.
Creating a Project with UV
Now let’s create a project with its virtual environment. At this stage, we can also specify which version of Python to use, for example, 3.11:
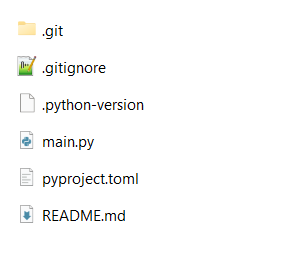
- In the command line, for example in Windows PowerShell, type the following command to create the basic project structure, which is a set of files and folders:
uv init python-project-arxiv --python '>=3.11'
- Create the virtual environment associated with the project with this command (the .venv folder will be created):
uv sync
- Add the libraries needed for the project, in this case arxiv (the pyproject.toml file will be updated):
uv add arxiv
- You can already test that everything works by running the command:
uv run main.py
- At this point, you can write the necessary code in the main.py file, which we then rename to search_articles.py for convenience.
- Once the program is written, you can run the following command to execute it:
uv run search_articles.py
In the following screenshot, you can see how the Python used in the first command is the system one, while the one in the second command is within the virtual environment:

How to Use a Project Created with UV
Now suppose we have saved the project in a GIT repository and want to: download the project, recreate the virtual environment, and run the program within it.
The commands to use are:
git clone https://github.com/ilclaudio/python-project-arxiv.git cd .\python-project-arxiv\ uv sync uv run .\search_articles.py
Note that on the PC used, Python and uv must be installed, but Python can have a different version from the project’s. The Python required by the project will be installed within the virtual environment.
What is the arXiv Library?
arXiv [4] is a Python library that allows querying arXiv.org [3], a widely used online archive of scientific articles in mathematics, physics, computer science, and other disciplines. With arXiv, you can search for articles by topic, filter results, and download metadata such as title, authors, and links.
Practical Example: Searching for Articles with arXiv
If you don’t need to create a project, you can create a temporary virtual environment with these commands:
mkdir arxiv-example cd arxiv-example uv venv --python 3.11 uv pip install arxiv .venv\Scripts\Activate.ps1
The last command activates the virtual environment on PowerShell, on Linux the command is source .venv/bin/activate, on Windows shell the command is: .venv\Scripts\activate.bat.
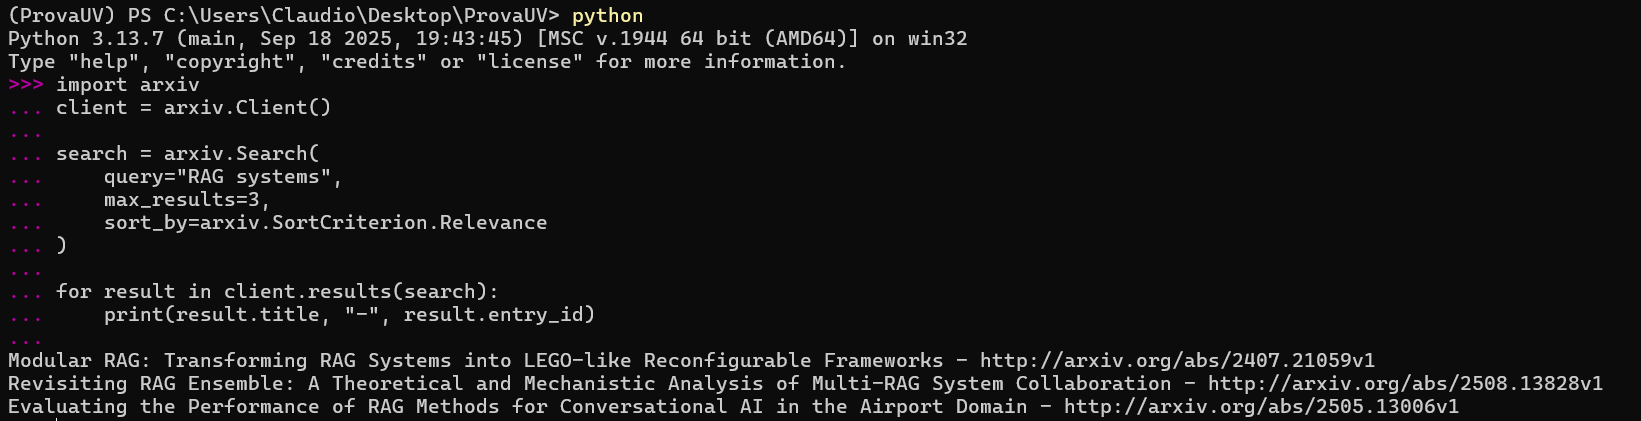
With the virtual environment active and the arXiv library installed, open a Python shell and try searching for, for example, three scientific articles about RAG systems, sorted by relevance.
Then open the prompt with the command:
python
And then copy and paste this code:
import arxiv client = arxiv.Client() search = arxiv.Search( query="RAG systems", max_results=3, sort_by=arxiv.SortCriterion.Relevance ) for result in client.results(search): print(result.title, "-", result.entry_id)
After pressing Enter, you will get a list of recent articles relevant to the topic “RAG systems” with links to their pages on arXiv.
With the deactivate command, you can exit the virtual environment.
Running the Search from a Script
Of course, with the Python prompt, you can do tests, but you will eventually need to write scripts.
For example, you can write the following code in a papers.py file:
import arxiv client = arxiv.Client() search = arxiv.Search( query="RAG systems", max_results=3, sort_by=arxiv.SortCriterion.Relevance ) for result in client.results(search): print(result.title, "-", result.entry_id)
And then run it from PowerShell:
python papers.py Or, even without activating the environment:
uv run python papers.py Saving and Reusing the Environment
Once the libraries are installed, you can save the list, still within the virtual environment, with this command:
uv pip freeze > requirements.txt
Similarly, if you already have a project folder with a requirements.txt file, you can install all the libraries in a virtual environment with these two commands:
cd my-project uv venv uv pip install -r requirements.txt
The requirements.txt file is used to freeze and reproduce exactly the same Python environment of the project because it contains both direct dependencies (those explicitly installed) and indirect ones (libraries required by the installed packages).
Conclusion
Virtual environments are an essential tool for working with Python in an organized and professional manner. With uv, managing them becomes simple and fast. The arXiv library is just one example of how a virtual environment allows you to experiment with different libraries without risking conflicts or “messing up” your global system. The two ways of using uv discussed in this post are alternatives; the first is an evolution of the second and allows for more organized project management.
Sources and References
- Installing and managing Python with UV official site of Astral.
- Anaconda: official site.
- arXiv Archive: online scientific articles, Cornell University.
- Python arxiv Library.
- Sample Program: python-project-arxiv, GitHub.
*** Note: This article was translated using an automated workflow created with n8n and OpenAI.